Choose Master Database file
If you are one of the lucky people that have several Master Database files to choose from, you will need to tell the program which one you want it to use. The easiest way to choose this is through the Master Database itself.
You will now have the screen as shown above. This is the Master Database file that your program is currently looking at.
You are now taken to your local directory. Navigate to where your required Master Database file is located.
Your Master Database file has now been set.
Customise your Master Database
Picture this: we have information for about 95% of any of the crops, varieties, fertilisers, operations and timing comments that our users require all located in our Master Database. These populate the drop down menus throughout your program. Chances are there are going to be large chunks of information that you never use. Our goal here is to cut this list down to things that you actually use to save you flicking through acres of superfluous information.
The terminology we use within the Master Database is “Exclude” and “Unexclude”. If something has a tick next to it that means it is Excluded (not included) in the lists within the program. Items without ticks are Unexcluded (included). Well confused? Just take it steady, one section at a time and be methodical.
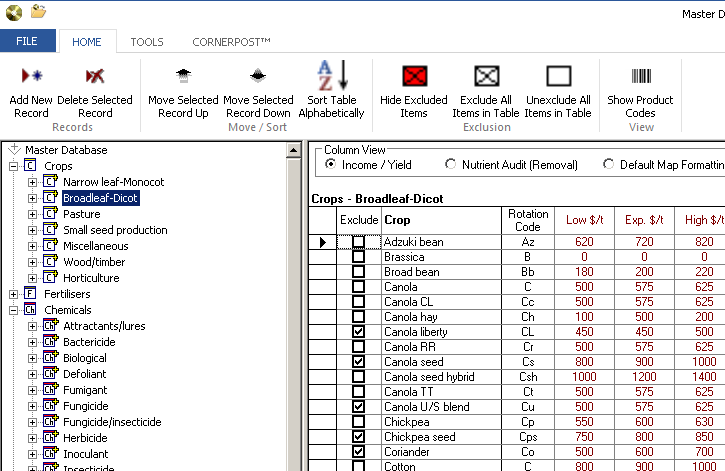
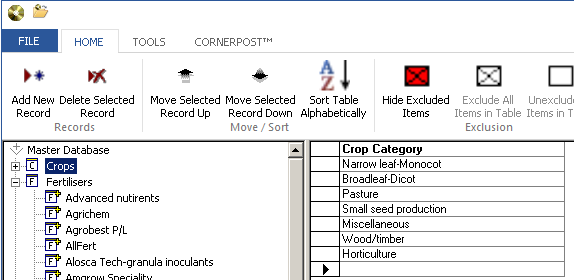
Starting at the beginning, so with Crops. There are layers in the Master Database, they are classified by Crop first, then variety. Excluding an item at the top of the ladder will exclude items underneath it further down the ladder. For example, if you exclude all Narrow Leaf Monocots, you will not be able to see any barley, sorghum, oats, wheat etc.
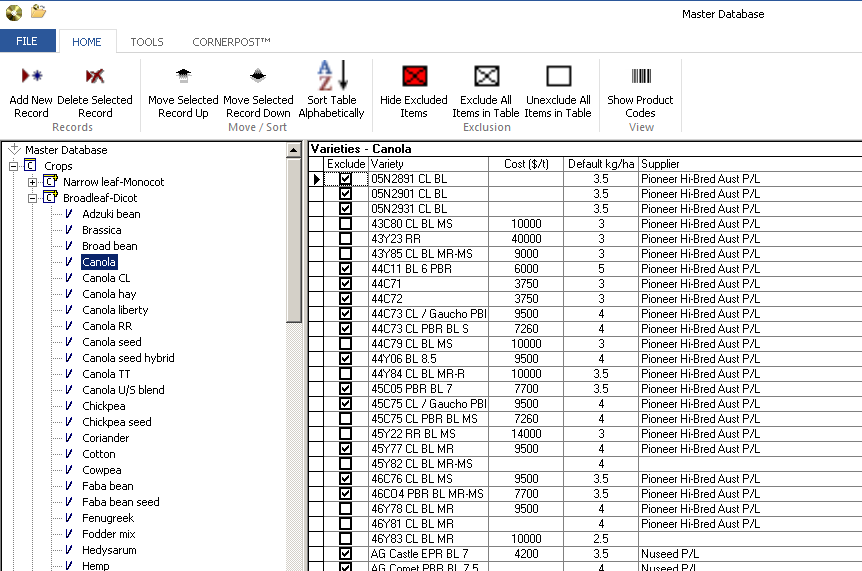
Clicking on the plus sign to the left of the classification (eg. Narrow Leaf Monocot) will show you a list of Crops in the left hand pane, and their corresponding Variety in the right hand pane. Layer upon layer!
Exclude crops that you don’t require first, and then varieties. You may find it easier to “Exclude All Items in Table” and then un-tick the ones you want to see. As a check, click “Hide Excluded Items” to show you a list of only those you have included for your database. Click this red cross again to make all lines appear. Continue to Exclude or Unexclude down the list of crops.
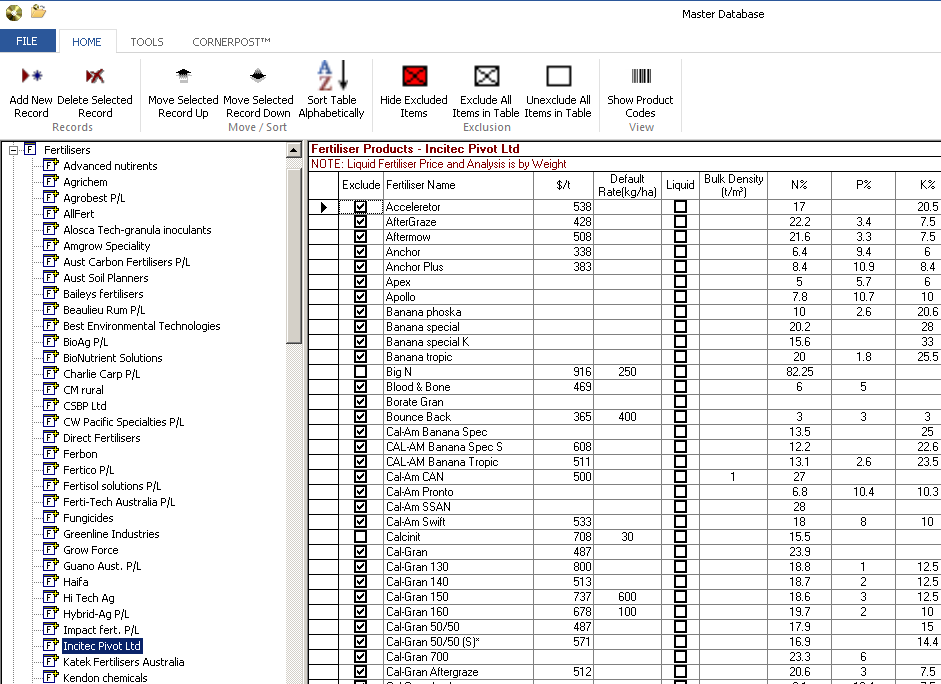
By now, you have probably got the hang of this. It’s a similar story for Fertilisers. If you click on the word “Fertilisers” the list of vendors will appear in the right hand pane for selection. Click on each vendors name in the left hand pane to see their fertiliser range.
We’ve tried to follow a central theme here. It is easily possible to add new items to your Master Database by selecting “Add New Record” from your chosen location. This is situated in the top left corner of your screen and appears as per below.
Clicking this will enter a new line at the bottom of the screen that you are on (right hand pane). In the example below, Add New Record has been clicked with Crops highlighted. This will allow us to add a new Crop Category by adding a blank line beneath Horticulture.
Details should then be entered as required. Click in any cell on the right hand pane to make adjustments to names or spelling as required.
Real time data editing is used to save changes to the Master Database, meaning that when data is entered into a cell the very minute you click off that cell the data is saved as a permanent record. Close out of your Master Database by clicking on the X in the top right corner of your screen. The changes you have made will be avaialble from 'next click on' - they will not go back and override existing entries for data security reasons. If you would like the changes made in the MDB to override existing entries (for example, for fert prices) follow instructions to Update Client from Master.
The Master Database also includes default information for prices, expected yields, nutrient levels, rates and much more. These are easily modified to suit your situation by clicking in each cell and typing the new number. This will save you modifying it in your program each and every time that product is selected.
Default map colours for each crop and/or variety are also set in your Master Database. Selecting these will ensure that colours remain the same each time. The instructions below are for Variety colour; if you would like to allocate colour by crop select the Crop Type in step 2 and select Default Map Formatting towards the top of the screen. Continue from Step 4.
These changes (and any made in the Master Database) will be available from the 'next click on'. If you would like the changes to override existing data entry in your given year, follow instructions to Update Client from Master.
This button allows the changes that we have just made to be immediately implemented in the program, overriding current year entries for the specified components. The steps below are for Default Map colours specifically, but ticking other boxes will adjust what is updated appropriately.
These changes will now be pushed through from your Master Database to your active client file, overriding current year entries where these exist. For example, updating Fertiliser Costs will override current year fertiliser cost data with that from the Master Database. This may not suit those who have entered data by hand according to individual purchase costs.